
1.6. Python Script from a Notebook File#
Now let’s use a Notebook file from when we created a surface map to start a script instead of writing one all from scratch.
Open the Jupyter Lab environment and open a notebook that contains some
Python code. Once the notebook is open navigate to the File > Save and Export As >
Executable Script in the Lab environment (Fig. 1.3).
This will either bring up a dialog box asking where you want to save the
script or automatically save it to a download folder (e.g., /home/<username>/Downloads)
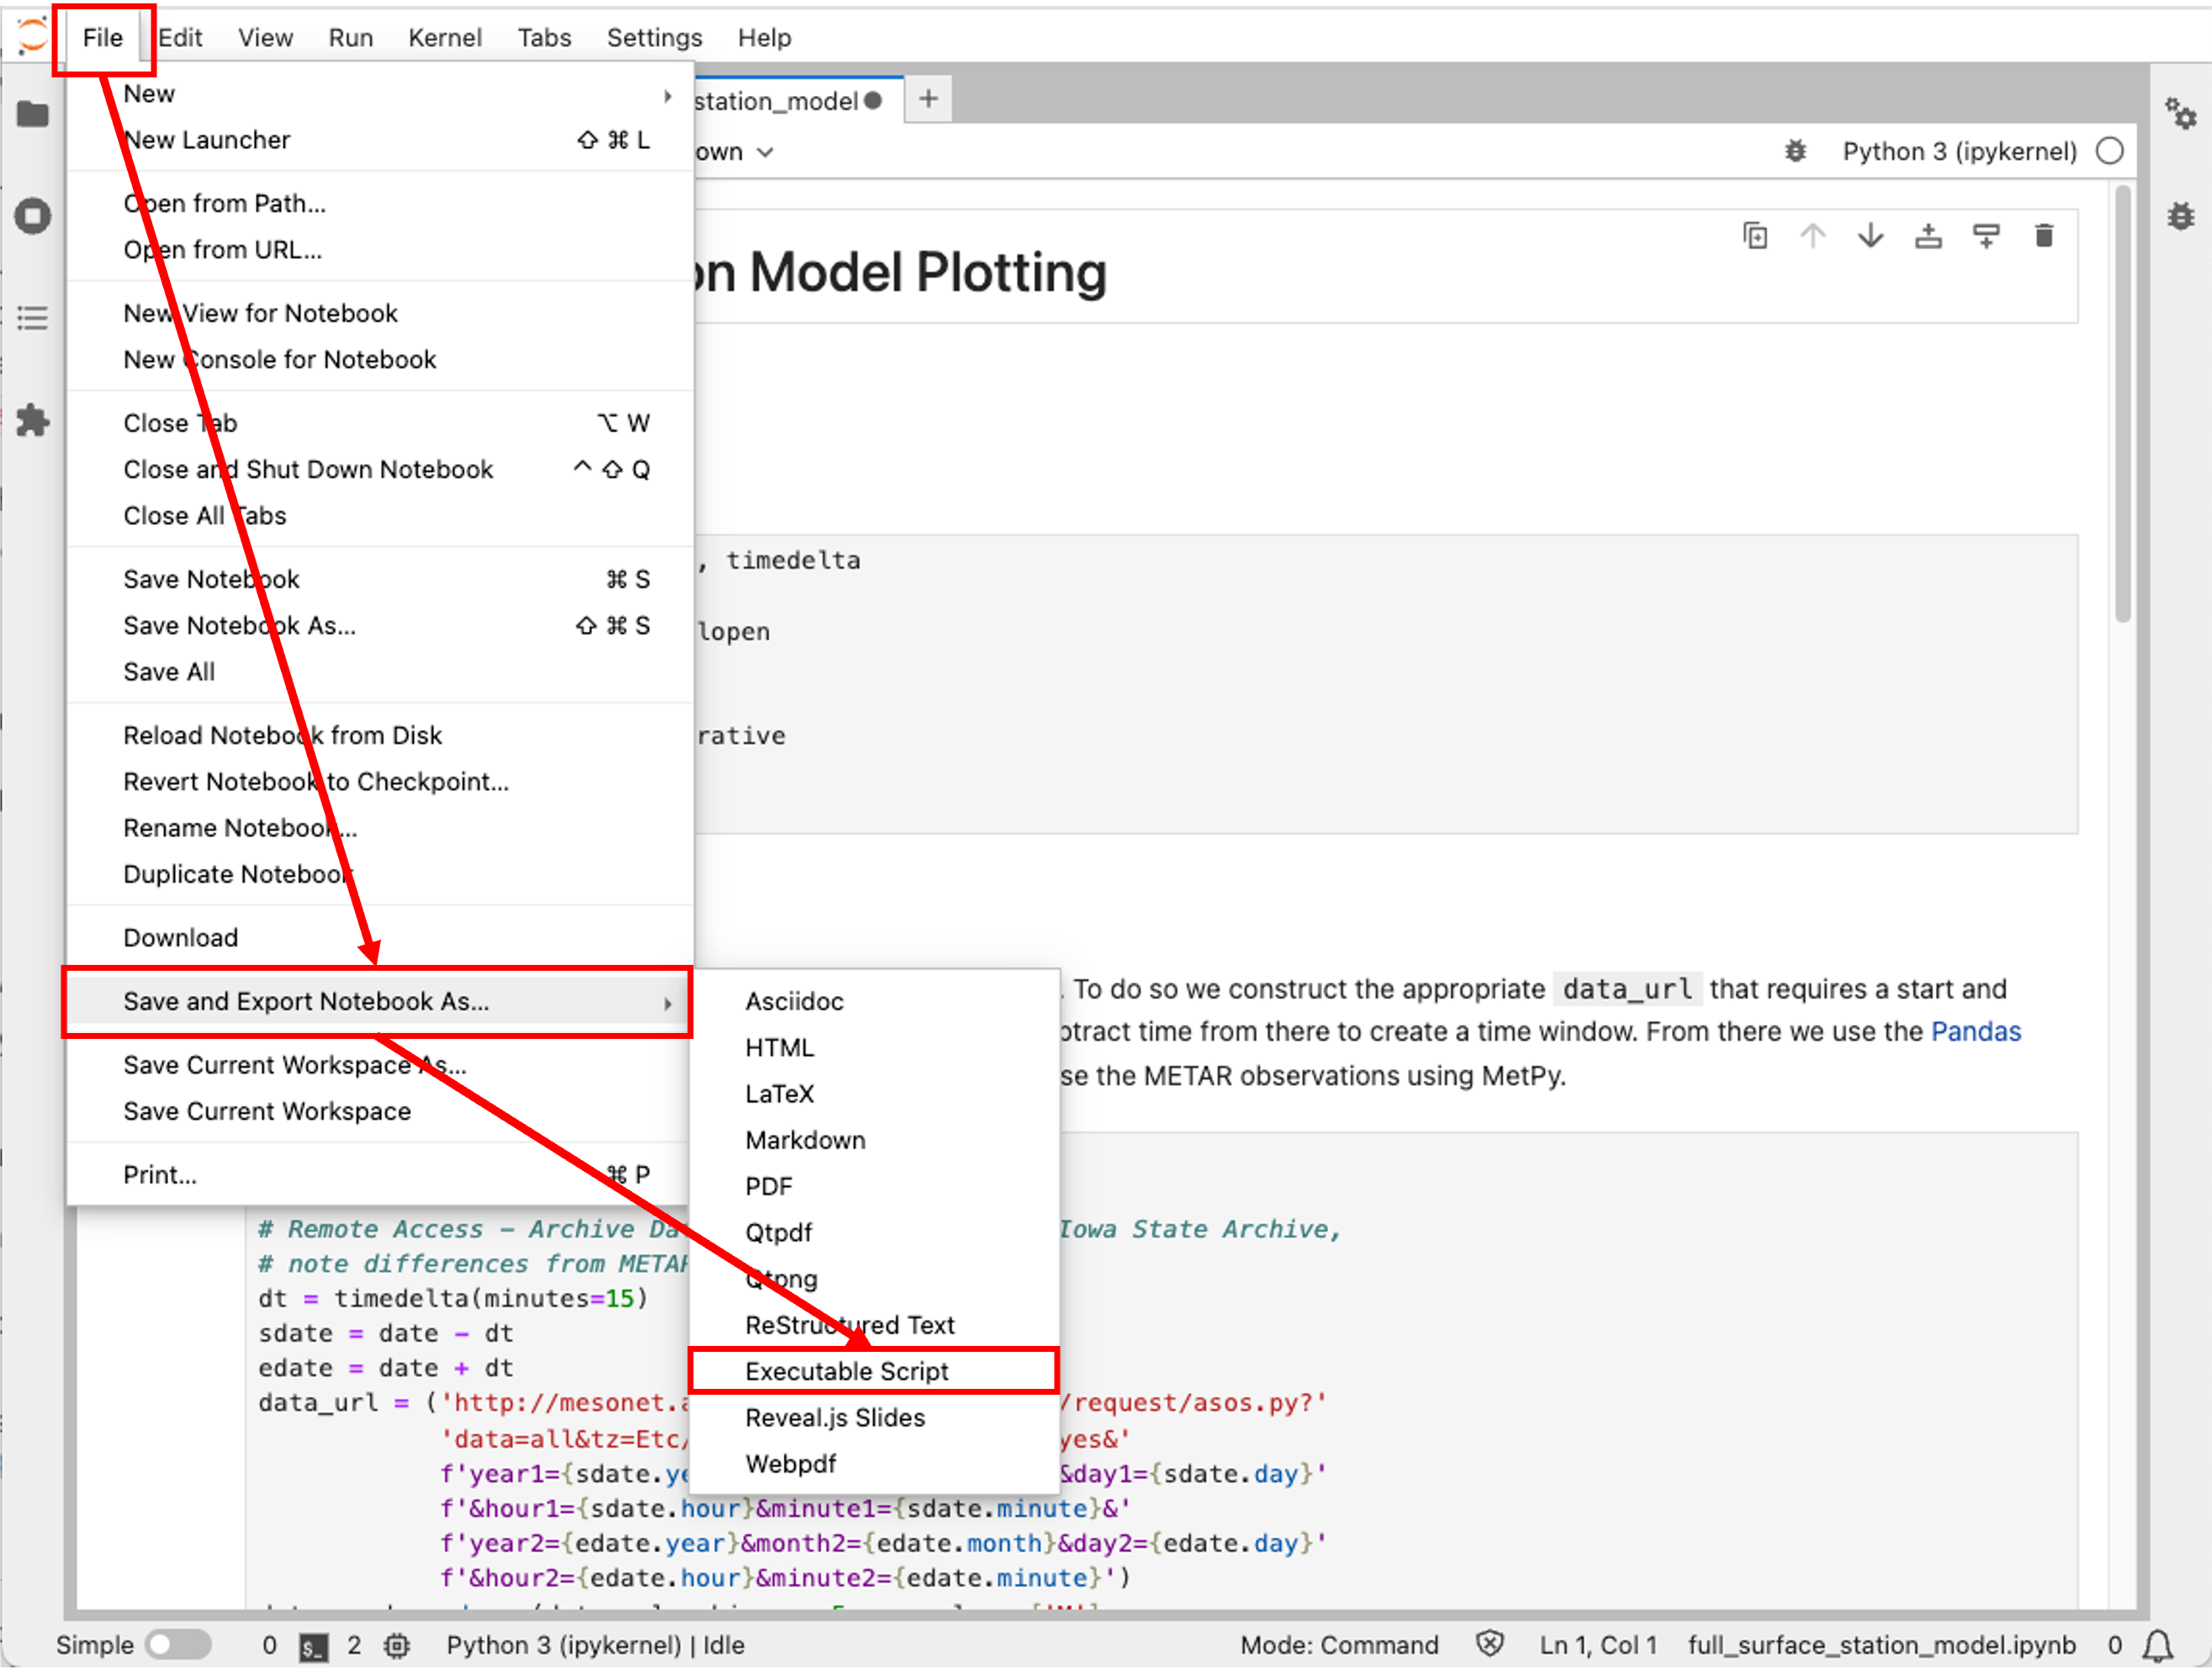
Fig. 1.3 An illustration of the clicks to save a Jupyter Notebook to an executable script file.#
Once you have saved the file, make sure you move it to your working directory (if it saved to your Downloads directory you’ll want to use the Linux command to move your file to a different location).
Now open the script with vi via a terminal window and we’ll edit it just a little before running the script.
Cleanup script from extraneous stuff
Unfortunately, there is a lot of “gunk” that comes with going from a notebook to a script, we’ll want to clean that out to make it all more readable.
Add a comment block at the very beginning of the script – do this so when you come back to it in April, you’ll know what was supposed to be happening with this script
Modify any lines to get current data from today at 12 UTC
Make sure to save the image as a .png and do not show the image.
Add any other comments throughout the script so you know what is going on in each section.
Once all modifications have been made, go ahead and run the script.
What happened? Did you get any errors? If so, read the error and try to modify what wasn’t working and run again.